

How To Make An Eva Foam Template
Allow me introduce you to the wonderful world of foam!
Many of you know, that Worbla is a groovy solution to create armor and props. This time though I would like to talk almost the super affordable alternative. EVA cream is cheap, widely bachelor and creating costumes and props with this material is super fun! So let'southward cheque out out!
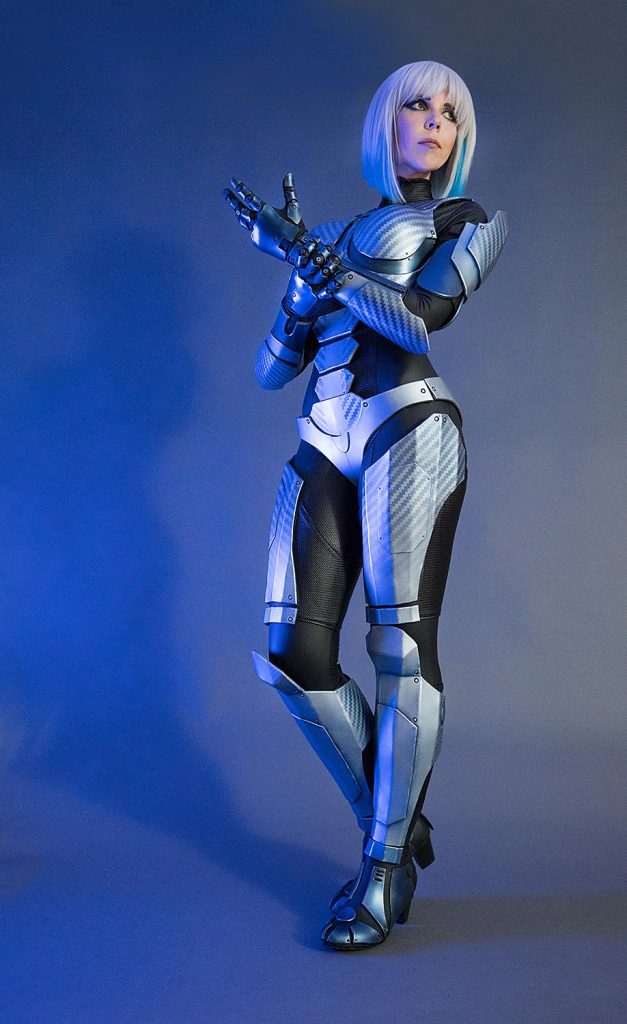
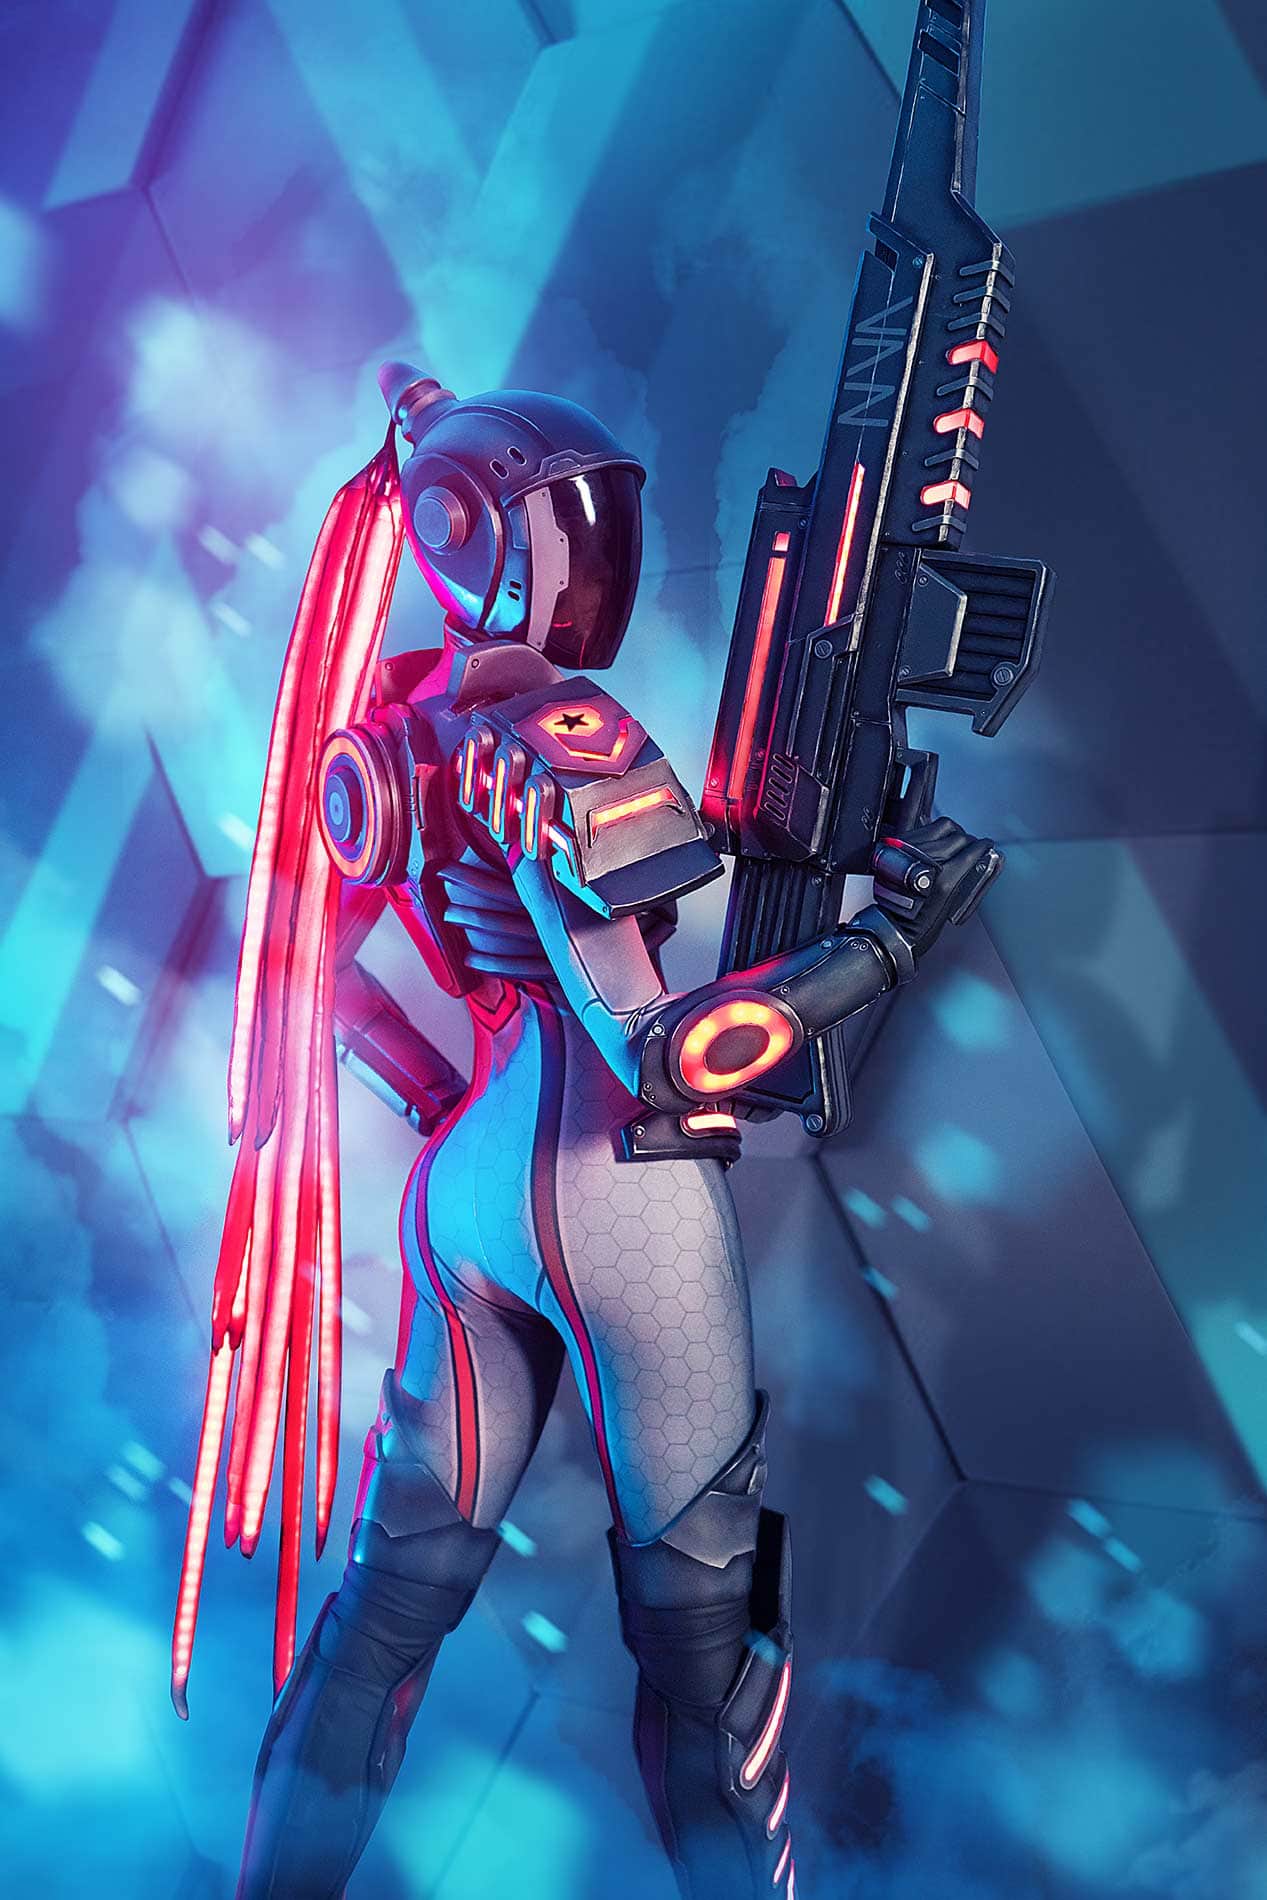
You might take noticed that many of my costumes in the past where fabricated mostly with the brown thermoplastic Worbla. I got a footling bit bored with it after a while though and switched to EVA foam, which gives me not only new challenges but likewise forces me to learn new techniques! So one of my latest projects was the Erazer Daughter, a commissioned costume for the German estimator manufacturer Medion. The whole armor was completely built out of unproblematic EVA foam in different thicknesses and therefore I was able to go along the material costs pretty low.
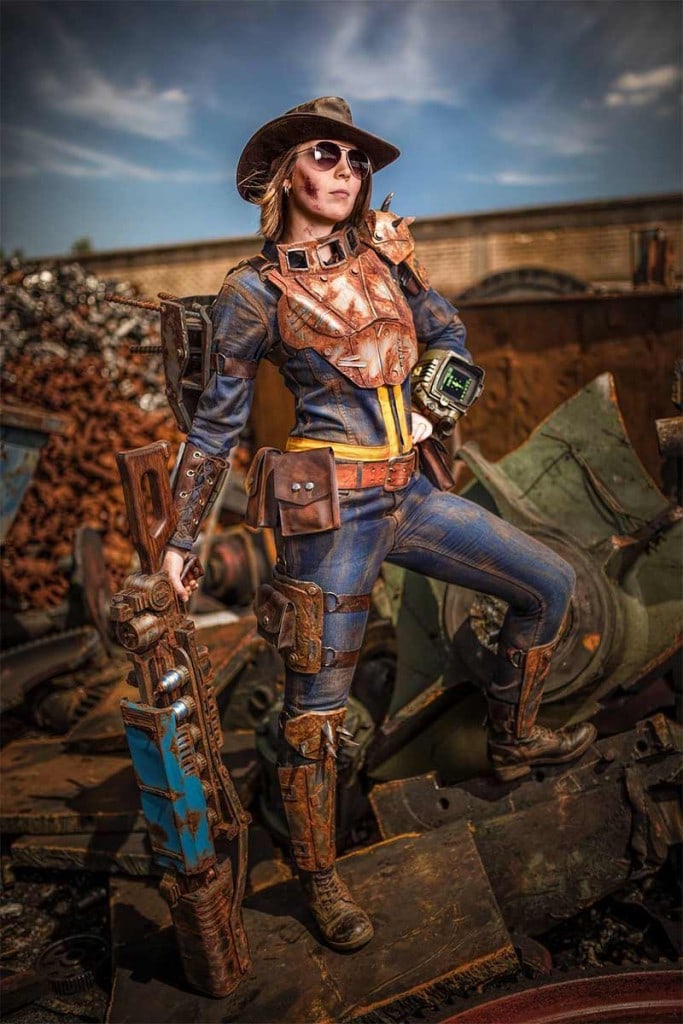
Another project was my Sole Survivor from the video game Fallout 4, which was my first complete foam costume and the first time I applied the rusting technique featured in my Advanced Painting Book.
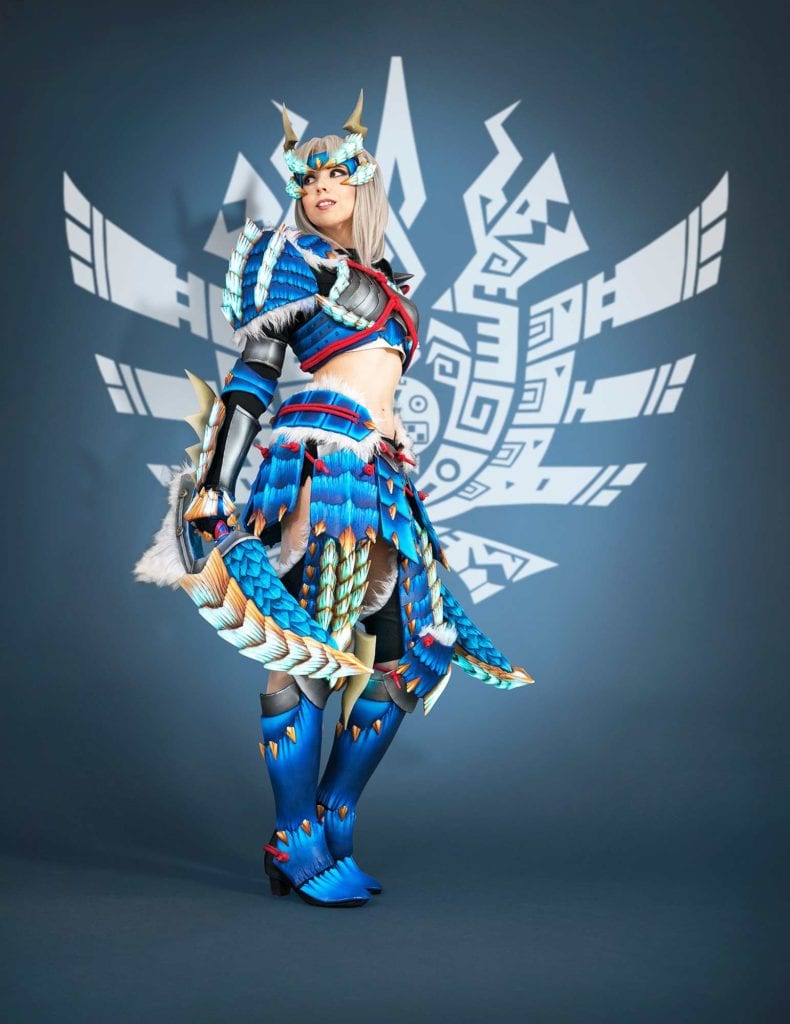
And finally, my Zinogre armor from Monster Hunter, which was my near elaborate foam project and then far. I think, all these projects show in a corking way, that EVA foam is great for creating cool costumes and props!
Crafting on a budget with EVA foam!
I really like how these costumes turned out! Plus: Their armor toll me possibly $l to $100 in full using mainly EVA foam! My other costumes in comparison were a lot pricer, less comfortable to vesture and more challenging to send. So, if you're searching for a expert alternative to Worbla, think about switching to EVA foam!
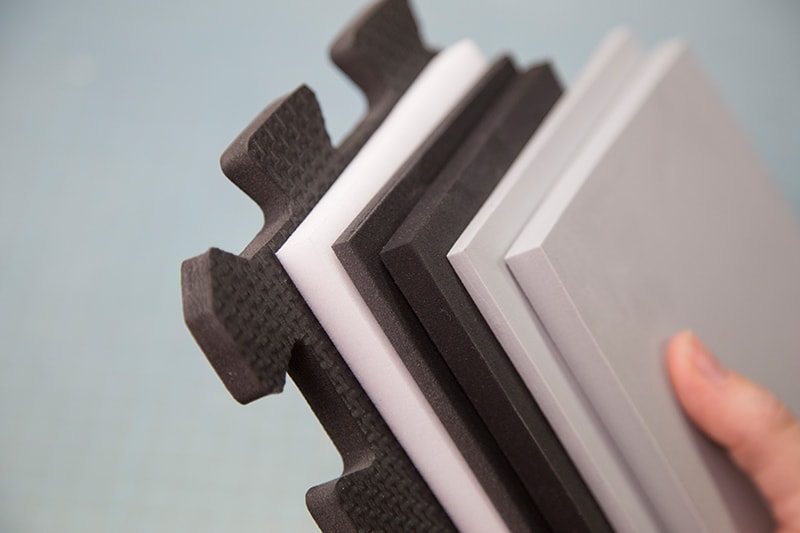
In full general, there are a meg different kinds of EVA cream in various thicknesses, colors, densities and chemic compositions. The nearly well known is probably cheap puzzle foam mats, which you tin easily find on Amazon. They are around 10mm thick, come up in a puzzle shape of lx x threescore cm (24 x 24 inches) and accept a rough texture on ane side. They are the cheapest version (half-dozen mats for 23$), but it volition toll you actress time and effort to built something (since you might have to get rid of the texture again).
My favourite crafting material
My personal favorite is high density EVA cream, which you tin get from cosplayshop.be, a crafting shop in Belgium – they also transport the US btw. I heard the cosplay cream from TNT Cosplay in the US is good also, but since they don't want to sell me samples, I don't know for certain. This fabric comes in ten, v, and 2mm sheets, is shine on both sides and a lot more durable compared to other EVA foams.
The largest size and thickness really costs 60€/65$ for a sheet of 2mx1m, but it is already plenty for a whole armor costume! Smaller sizes come a lot cheaper of class. That's surely a fleck more pricey than the inexpensive flooring mats, but the material already comes smooth on both sides and yous have a minimum of waste since y'all'll become a single, very large sail of cream and don't accept to cut away the puzzle borders.
How to find the right EVA cream
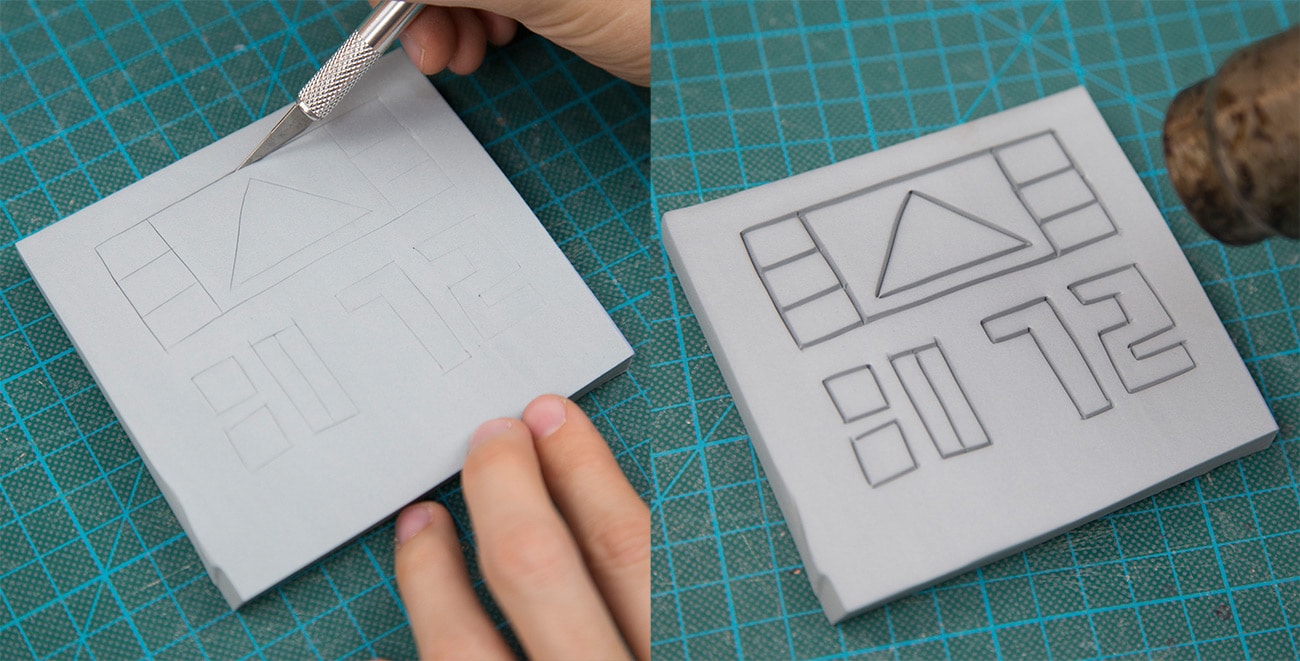
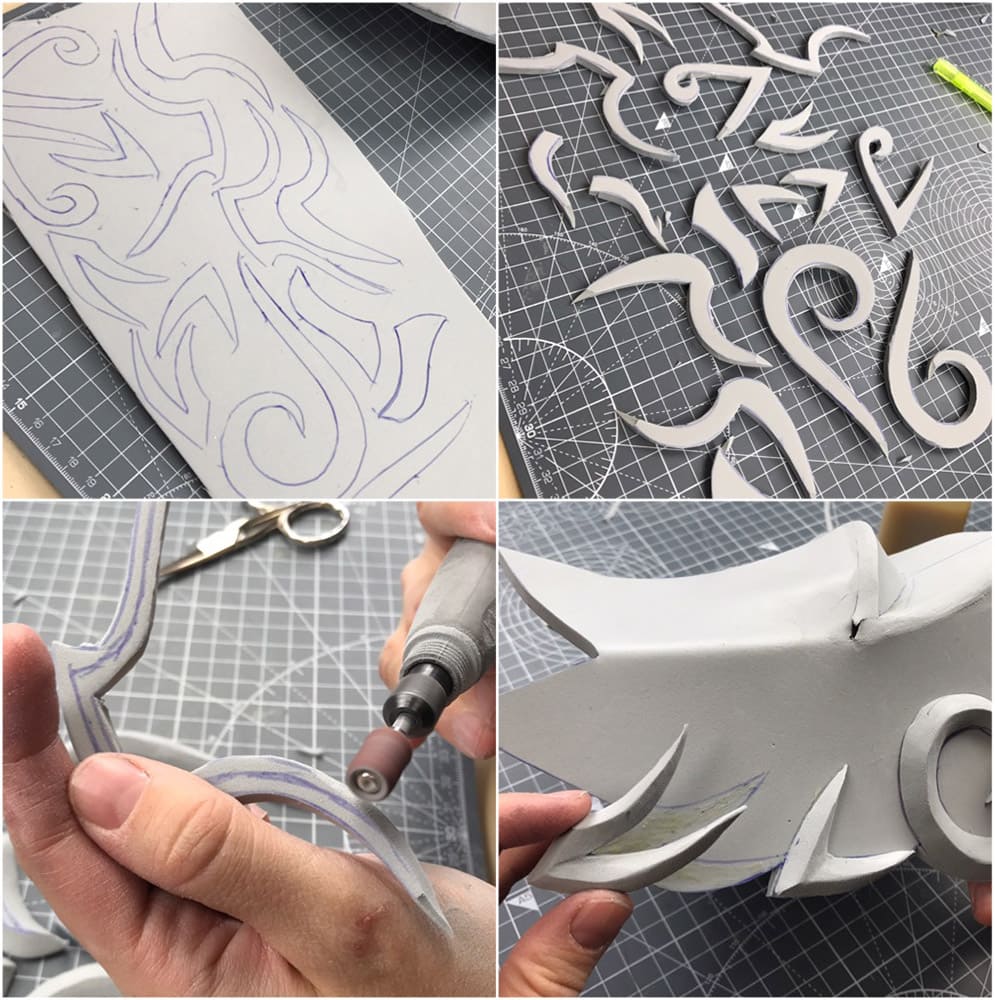
Creating costumes with EVA foam might crave some research. Depending on what yous want to build, it likewise helps a lot to find a cream which actually shrinks by heating it up instead of just melting. You tin can see why in the following moving-picture show. By cut lines with a sharp bract and heating information technology upwards afterwards, the lines will widen. This is extra helpful for adding details on armor and props. Only order a sample and effort this out, then yous're good to become for your upcoming material order! (P.S. If you have foam that melts, the cuts will disappear again when y'all rut it up!)
Aside of loftier density EVA foam, you'll also ofttimes discover black mats, which are softer. They are called L200 in the US, Pro Foam S from Craftperium (a crafting shop in Germany) or EVA-PE45kg from cosplayshop.be, all pretty much the same products. This cream is cheaper and melts together under estrus, though information technology's easier to heat shape and is more than lightweight. Just the perfect materials for affordable armor costumes! Information technology'due south also the black foam you'll see in the post-obit pictures.
What else exercise you lot need?
As you tin gauge, you will also need some glue to connect your foam pieces. Different Worbla, cream doesn't just stick when yous heat information technology up, just needs a potent agglutinative to stay in shape. A mutual solution is contact cement, contact glue, Kontaktkleber in Germany or Clomp (in the U.s.). I'm using contact gum from cosplayshop.be.
Contact cement is basically a very strong adhesive which yous have to apply in thin layers to both sides, allow it dry properly and then press both parts together afterward. Depending on the glue, drying might take a scrap longer. Mine dries really instantly and allows me to work pretty fast. The bond created here might destroy your foam if y'all attempt to rip it apart, so work carefully and retrieve well-nigh your next steps.
Additionally you'll need some tools to work with cream but nada fancy: A box cutter and an exacto knife, a dremel and a heat gun. That's pretty much all! And yep, even if you adopt to build your costumes and props every bit uncomplicated and cheap as possible, these are tools you lot have to get. They are pretty basic and I guarantee y'all, you'll demand them for all your upcoming projects equally well. I'm actually also using an flex shaft extension, for my dremel which allows me to work more than precise.
Some tips and tricks to build awesome costumes and props
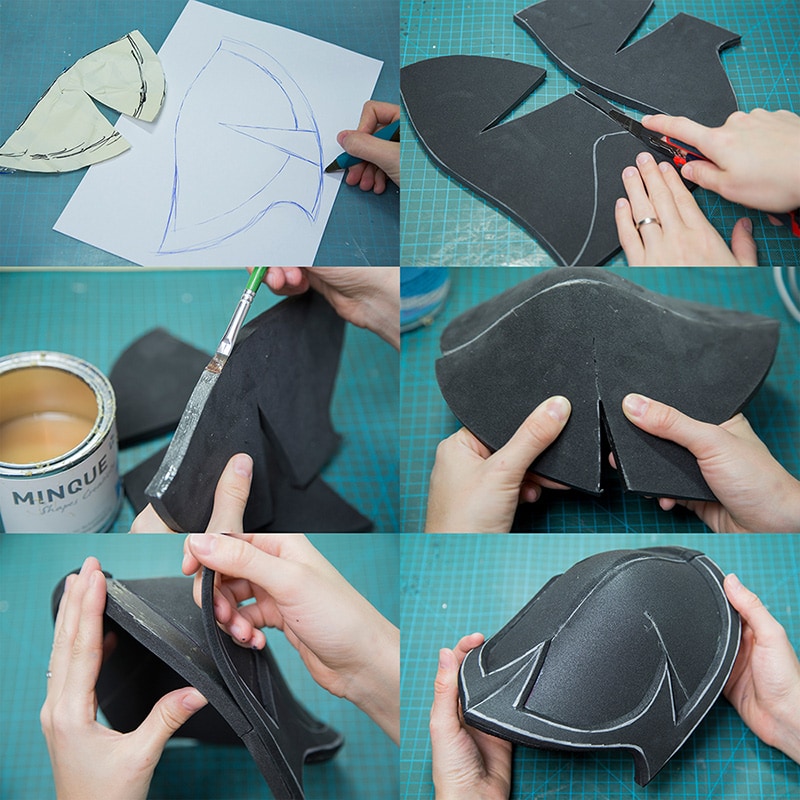
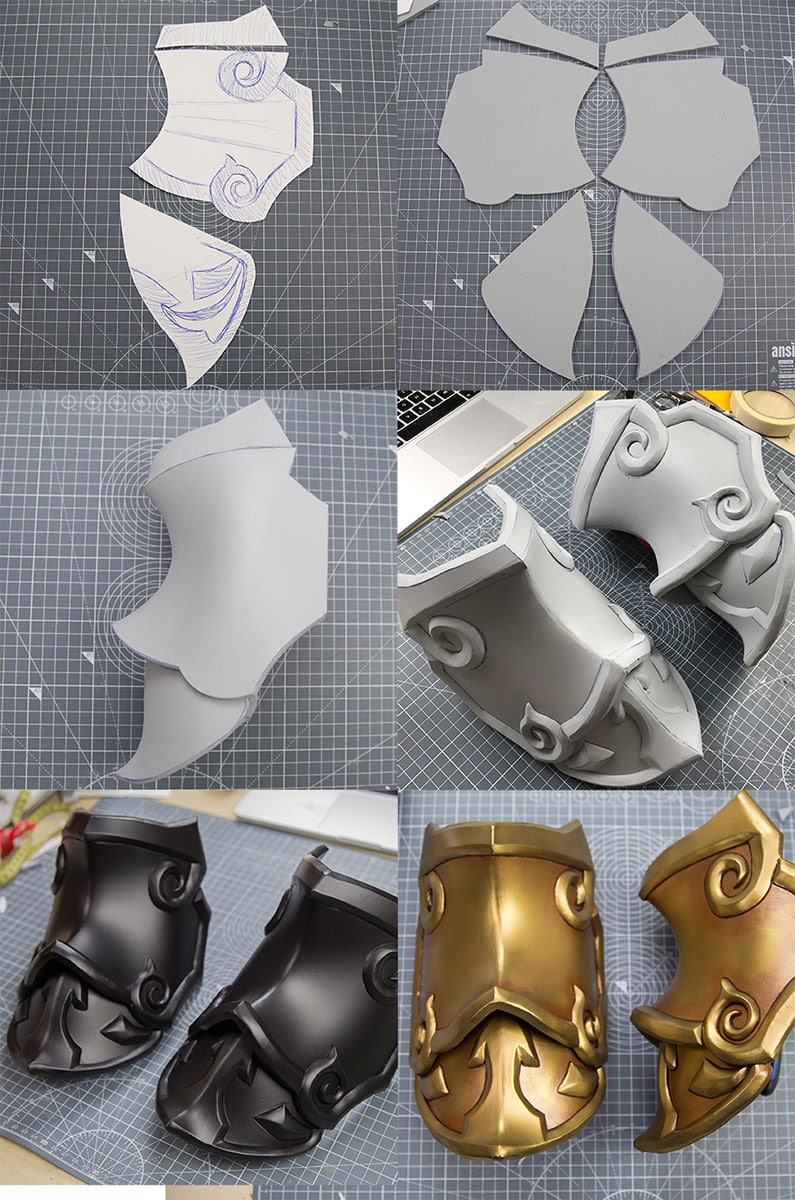
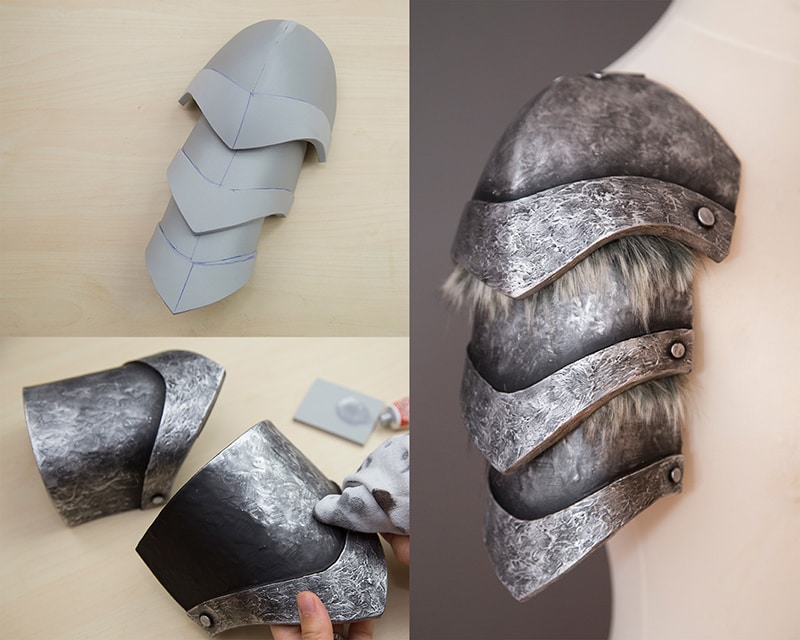
So do you wonder, how creating costumes and props with EVA foam works? Well, equally e'er you'll demand a pattern first. I made one for a shoulder armor and adjusted the shape a fleck. After I transferred the template on 10mm black EVA foam, cut information technology out with my box cutter and covered the edges with contact cement. Once the agglutinative was dry enough, I simply pressed both edges together. For a fiddling fleck more depth I added an additional layer with a beveled edge and my shoulder was done! Super simple, correct???
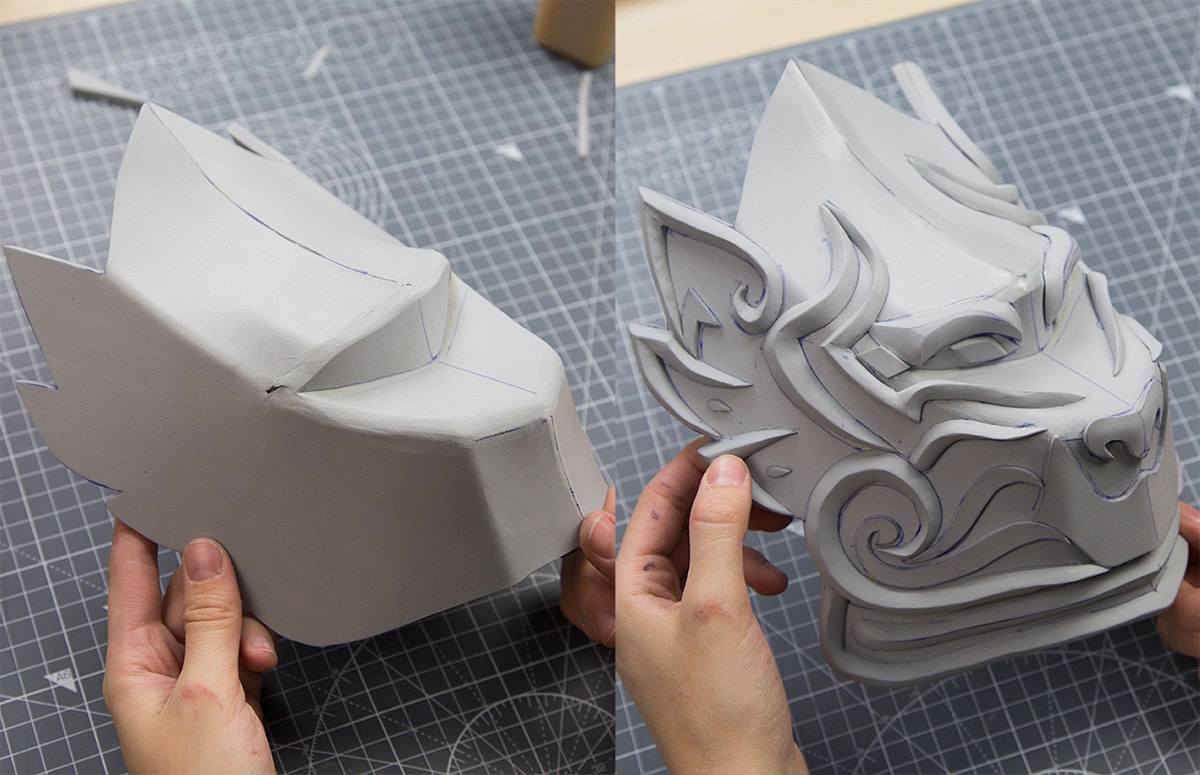
That'southward how I also made the details for the armor of my Monk costume.
Here is also a making of video:

By loading the video, you hold to YouTube's privacy policy.
Learn more
Load video
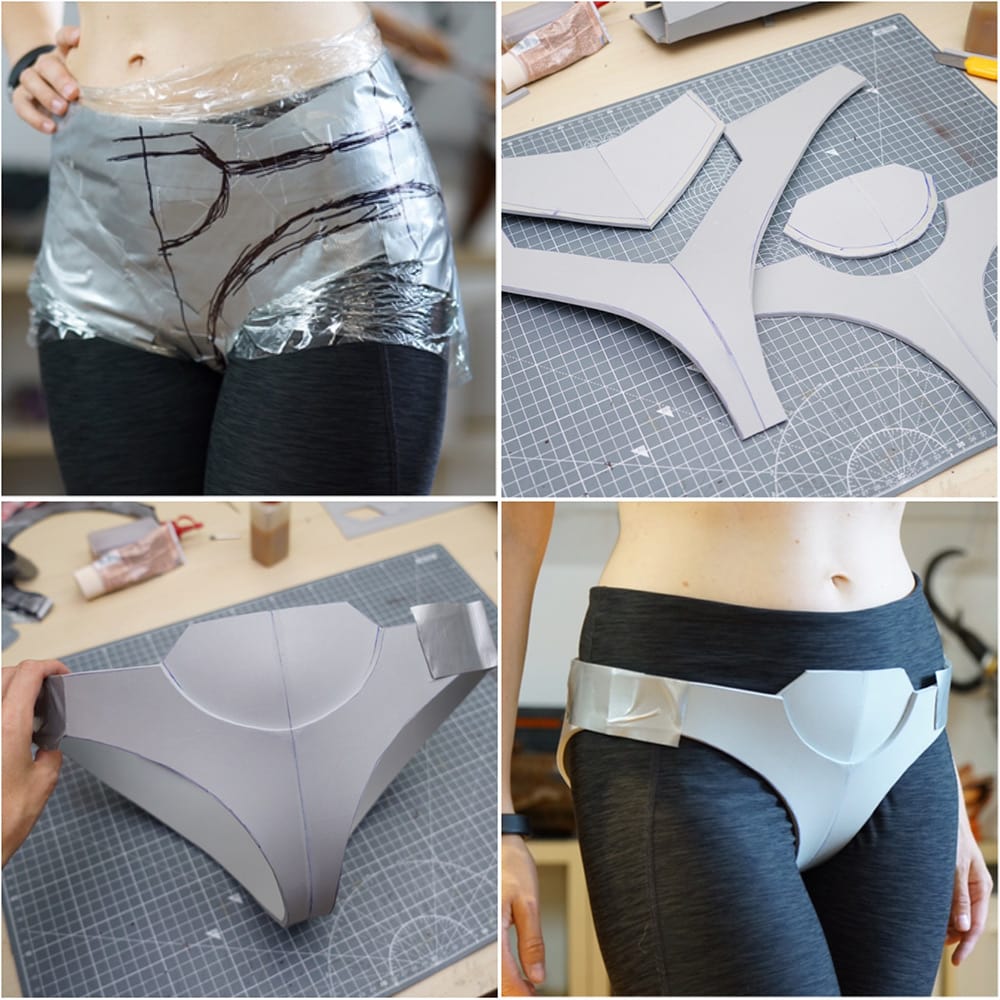
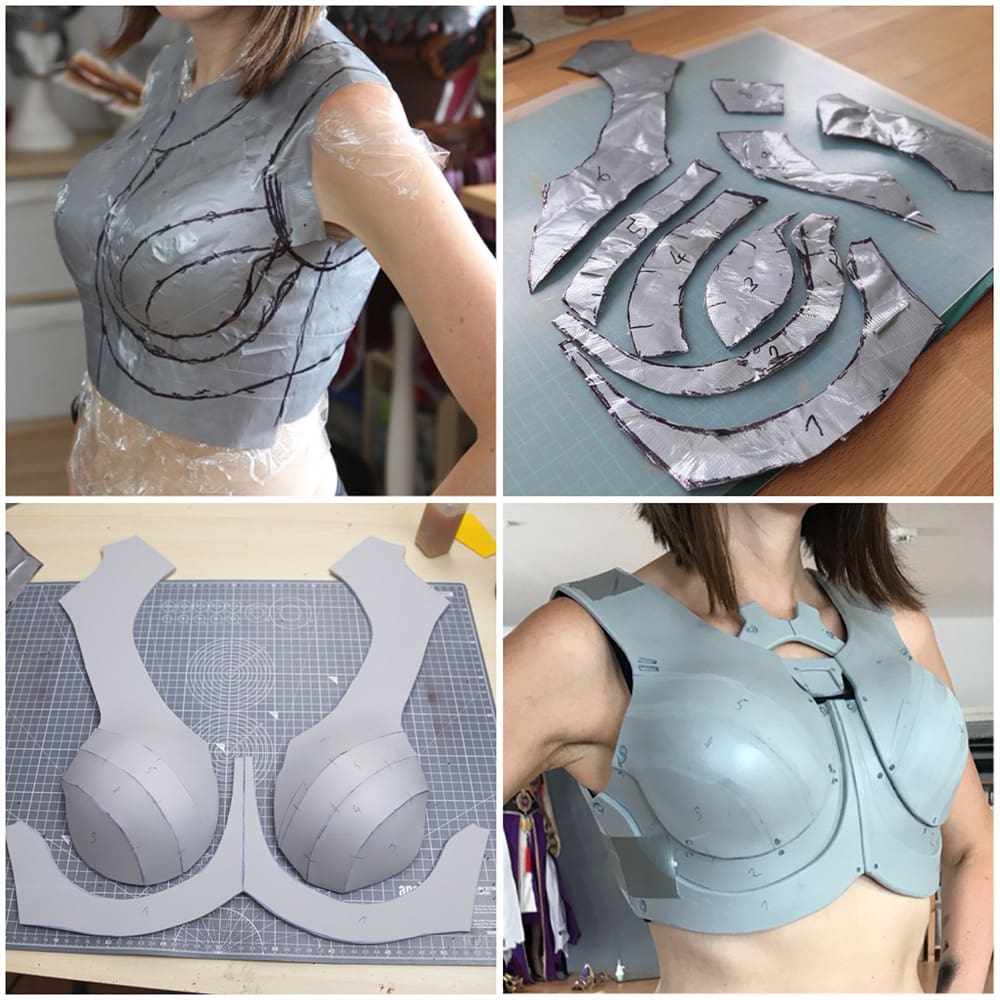
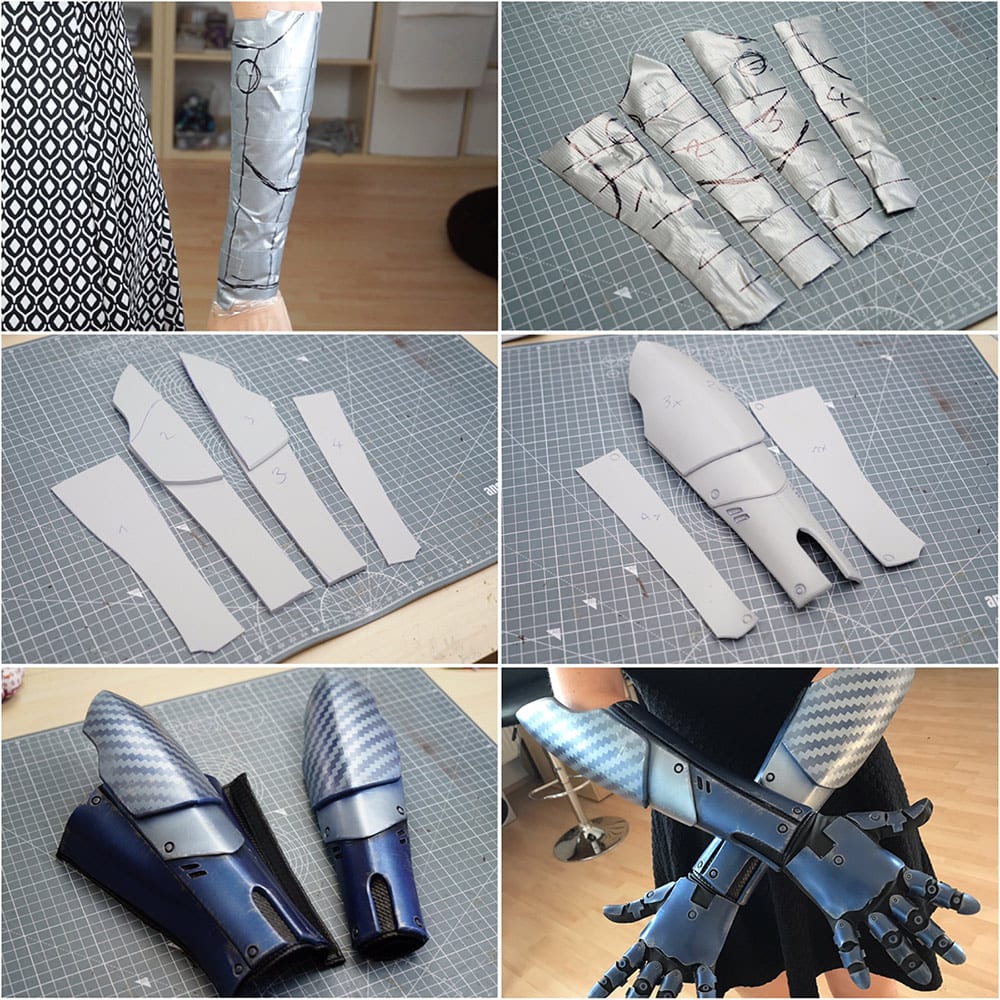
A better case might be the progress of my Erazer Daughter. As yous run across, I always merely wrap myself in plastic wrap and duct tape, draw the shapes I need on, cutting them out, glue them together and bring them into shape. Information technology's a pretty simple technique, which you can utilise for pretty much every armor piece you want to create.
Here is detailed making of video of the entire costume if want like to see more than:
By loading the video, you hold to YouTube's privacy policy.
Acquire more
Load video
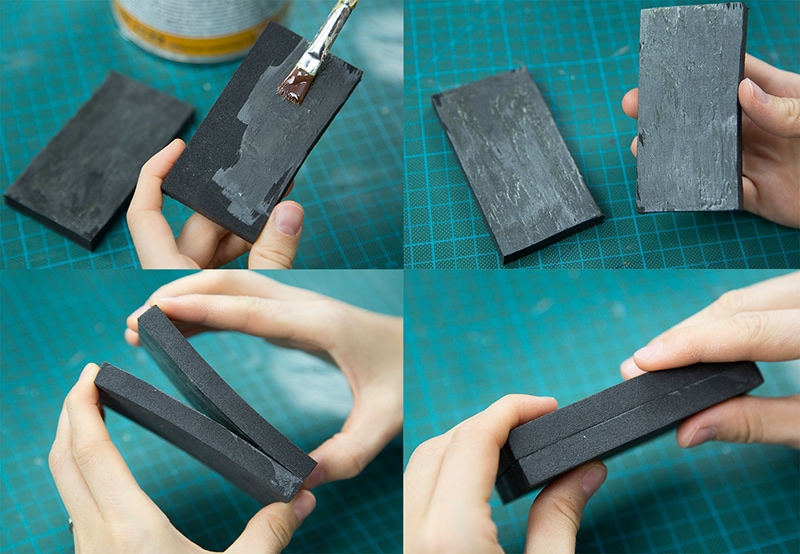
And finally hither is another shoulder slice – this time with a fancy paint job. I simply applied a bumpy texture with some latex and texture paste, painted information technology blackness and rubbed it carefully with the wax paint Rub'n'Buff. The result looked just like metal, despite of being simply cream! You lot'll find a more detailed tutorial in my latest Advanced Painting Book!
Time for some EVA foam priming fun!
You'll also detect some helpful tips and trips regarding to priming. My current favorite is PlastiDip, which is a spray on rubber coming from the car manufacture. It'due south actually toxic and flammable, and so y'all'll demand expert ventilation or have to spray outside. I actually build myself a handy spray berth out of an IKEA closet. Additionally you need some practice to get a clean application (Benni always messes this up!) and using this stuff for a whole armor ready might be a flake pricy. A can in the US simply costs around 6$, but in Europe information technology'due south more like 16€ (GummiDip is a cheaper High german alternative that works cracking too). You'll need around three layers and then they exercise not concluding very long.
A cheap alternative is latex milk. It's a natural product, tin can exist brushed on and is completely non toxic. If you lot apply it with a brush, you might create little flakes in your priming coat then be careful. If yous similar to have a super smooth base for your paint job, latex probably isn't the right solution unless you filter it and spray information technology on with a critter gun. You also need special colors to paint latex.
Something I really similar is actually Flexbond, which seems to exist a mix of latex and white glue. It'southward works basically similar elementary white glue, though it dries out flexible. This means your paint won't chip of anymore and you don't demand to worry about cracks in your armor. Conspicuously a good culling if you don't similar latex or Plasti Dip. Yous'll get Flexbond in Europe from cosplayshop.be and in the US and Canada from cosplaysupplies.com.
I actually uploaded a video comparison unlike primers for EVA foam:
By loading the video, y'all agree to YouTube'due south privacy policy.
Learn more than
Load video
It's all about the right paint job!
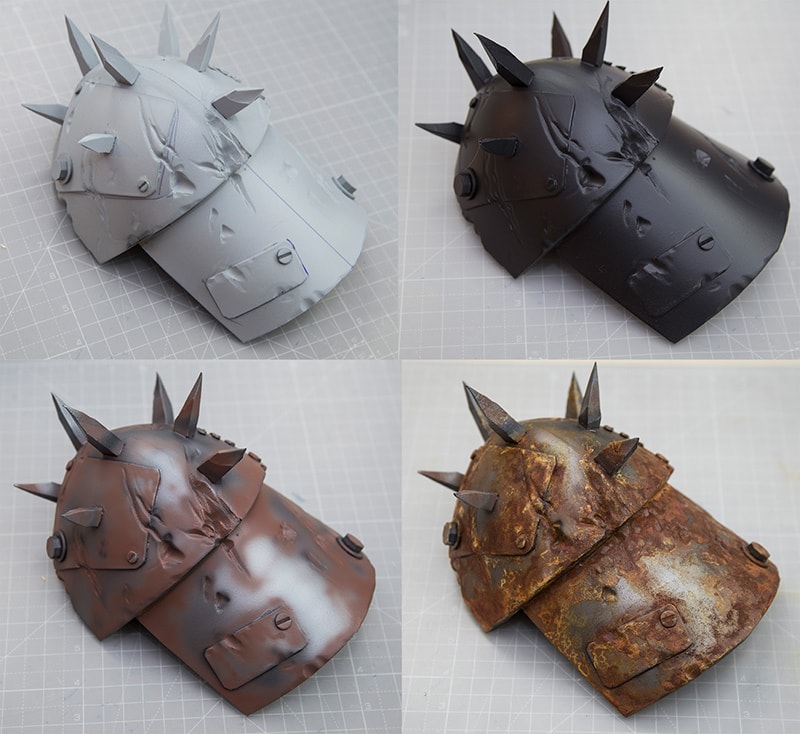
Oh, and this is an armor piece I made out of high density EVA cream and primed with Plasti Dip. Wondering about the cool rusty paint job? My Avant-garde Painting Volume for volition help you!
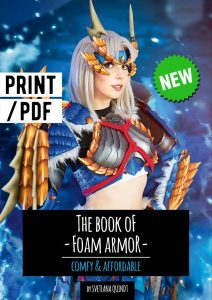
If you desire to get more than info almost costume and prop making, cheque out my detailed EVA Foam Armor Book, which covers in detail how to observe the right material, how to create perfectly fitting patterns for your costume designs, cut, shape, prime and paint your armor and how to attach everything properly to your body!
Well, dorsum to the topic…
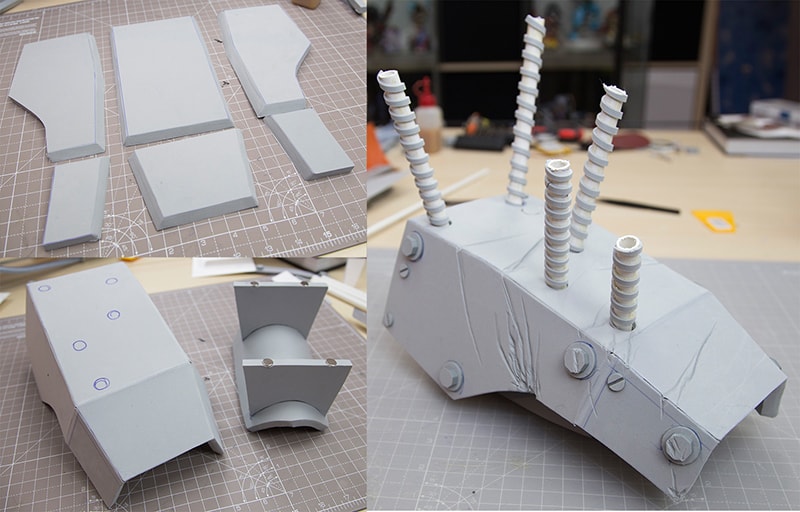
Another shoulder armor (everybody needs shoulders protection!). The shape is completely different, though the pattern is still super unproblematic. I used my dremel to sand down the edges into the right angle and continued all pieces with contact cement. The "metallic rods" were merely PVC pipes wrapped with 2mm stripes of EVA foam. For an used and realistic look, I also added some boxing impairment with my dremel on top.
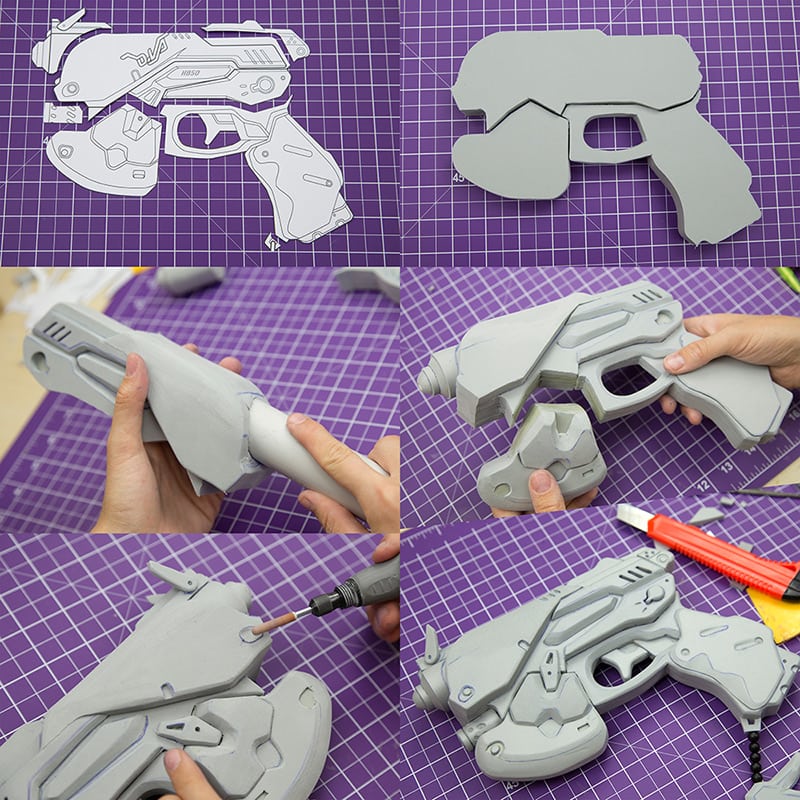
And here is a little step by step guide of my D.Va gun from Overwatch. You can as well download the pattern here if you lot want to build information technology yourself! :) Hither you tin watch a complete set of videos that explains how we built this prop:
By loading the video, y'all agree to YouTube's privacy policy.
Learn more
Load video
Practice yous desire to larn more about EVA foam guns? I already wrote a book almost this topic: Advanced Prop Making – Guns and Rifles.
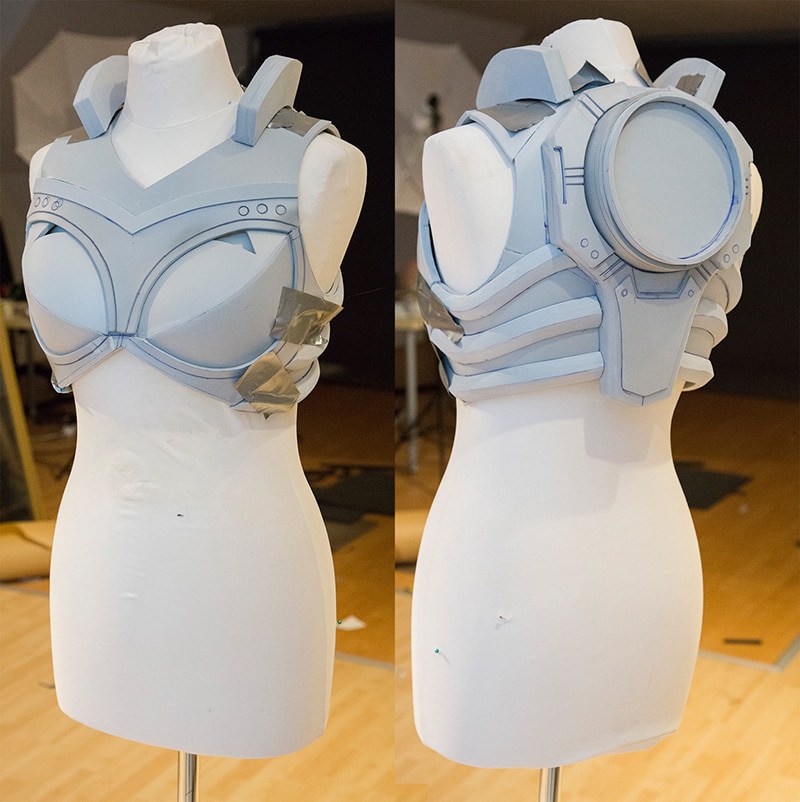
And last but not least, here is an EVA foam breastplate from my already finished Nova costume from Heroes of the Storm.
You tin do it!
Equally y'all can see, creating costumes with EVA cream is non rocket science, simply takes some patience. Planning a costume or prop alee of time is always helpful likewise. That's why I always set patterns and Benni draws blueprints for me. EVA foam is a great material, though you don't only snip with your fingers and your costume is done. Aforementioned goes for Worbla though. Both materials take their advantages and disadvantages, merely I hope this posts shows y'all that some skill and fourth dimension is plenty to create something awesome fifty-fifty with a tight budget.
So, no demand to worry! Instead get upward and start crafting! :)
As well, if you like to get some more inspiration and ideas, check out my tools and materials listing! Here y'all non only find a listing of enough international cosplay shops, simply also affiliate links for my favourite tools and materials on Amazon. Using these links supports us directly and I hope it will aid you to find what yous demand for your next project!

How To Make An Eva Foam Template,
Source: https://www.kamuicosplay.com/2017/10/09/creating-costumes-with-eva-foam/
Posted by: tomczaksayint.blogspot.com
0 Response to "How To Make An Eva Foam Template"
Post a Comment